Monday, November 22, 2010

5 Keys to Equalization (EQ Part 2)


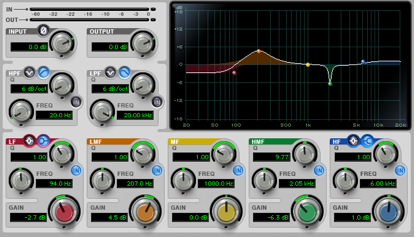
As mentioned in Part 1 of this blog, Audio Equalization, EQ is the one of the most important tools to use as an audio engineer. Knowing when or when not to use it, as well as how to use it can have a big impact on the sound you are producing. Here are 5 key tips for using EQ.

Less is More:
When soundmen first start using equalization, they tend to increase frequencies to bring out certain aspects of a sound. This can be useful in some cases, but most of the time this is a no-no. The temptation to have more of whatever it is (e.g., bass presence, guitar, vocals, etc.) is often reinforced by the fact that increasing the EQ level of that channel also increases the volume. After adding a little here, and a little there, a mix can get real muddy real quick. Instead of adding EQ, try and think about what you can take away from the mix to make the overall sound quality better. For example, if you need more presence from the guitar, think about other instruments that are competing with it and reduce of those frequencies in the mix.

Don’t Get Fancy:
Some engineers have every frequency of every instrument memorized and start EQing all their channels to bring out the frequencies that are applied to the instrument on that channel. Although knowing instrument frequency ranges can be good, not every venue, event, or audio equipment is going to be the same. So, before you get all fancy with the EQ knobs, listen to the mix with a ‘flat’ EQ (without equalization applied). If you mic’ed everything well and are in a good venue, then a large amount of equalization should not be needed.

Balance, Balance, Balance:
This goes along with understanding the frequency ranges of different instruments. Sometimes one or more instruments will be competing with each other in the mix. To get a more clear mix, before you crank the volume of one instrument over the other, separate the balance of their frequencies. For instance, the kick drum and bass guitar often compete in the low frequency range creating a muddy mix. Try to balance them out by having one occupy the extremely low frequencies (below 80Hz), and the other occupy a slightly higher range (from 100 to 220Hz). This will give each instrument a distinct ‘space’ in the mix, creating a balance that is clean and identifiable. 


Listen to the Mix:
It is good to use the ‘Solo’ button when equalizing a particular channel, or instrument. However, be sure before you make any permanent adjustments to listen to the whole mix. Remember that your job as an audio engineer is not to make a certain instrument sound good, but to make the whole mix sound good.

Give and Take:
If you do us EQ to boost a certain frequency, which is fine, be sure to think about the other instruments in that frequency range and reduce the other instruments in that range. So less EQ is required of the boosted channel. 

*For more info on Frequency Ranges check out: ObiAudio

Audio Equalization (EQ Part 1)

EQ (equalization) is one of the most important tools at your disposal as an audio engineer. In its most basic form it is a tone control, used to change the frequency balance of a signal. Most of us have encounter EQ on our car and home stereo systems with the treble and bass control knobs or a set of hi, mid, and low tone controls. These types of controls are adequate for rudimentary adjustments, and are usually used in such a way, however, they only provide two or three controls for the whole entire frequency spectrum, so each control adjusts a fairly wide range of frequencies.

Advanced equalization systems provide a fine level of frequency control. When using EQ you want the ability to adjust a narrow range of frequencies without affecting neighboring frequencies.

Whether your recording or running sound for a live event, there are 4 main types of EQ to use: Shelf, Bell, Graphic, and Parametric. (Ok, actually there are 5 if you include the use of a filter, which comes on most any mixing console.) In part 2 of this blog I would like to give 5 Tips for Using EQ, but now lets take a look at these common types of EQ.
 
FILTER EQ
As can be seen in the image right, a filter cuts out the frequencies above or below its cut-off point. Low-pass filters will only let low frequencies through, cutting out the highs; whereas a High-pass filter will do just the opposite. These tools are useful when unwanted frequencies at the high or low end are present. For example, if a mic was picking up stage rumble (at the low end spectrum) then use a High-pass filter. When micing a kick drum or bass guitar, use a Low-pass filter.

SHELF EQ
In shelving equalization, all frequencies above or below a certain point are boosted or cut the same amount, creating a “shelf” in the frequency spectrum. In a way, shelf EQ works like the High and Low-pass filters, except you are in control of the frequencies selected and you can apply a gentle roll off as opposed to a heavy cut from a filter.

BELL EQ
If you want to affect a frequency band at each end of the frequency spectrum, then a Bell Curve is needed. This type of equalization allows you to selectively boost or cut a limited band of the audio spectrum. There is usually one knob that selects the cut off point (the central point of where your want to boost or cut a frequency), and another knob that sets the dB level of the boost or cut. The dB level is affected the most at the cut off point and then frequencies further away are affected less.


GRAPHICAL EQ
As the name implies, a Graphical Equalizer uses a graphical layout to represent the changes applied to certain frequencies. Graphic EQ’s are commonly referred to by the number of frequency bands they have (e.g. 51-band, 31-band). Each band corresponds with a set of sliders and you raise or lower each slider to boost or cut the level of that frequency. Typically, the more sliders you have the more control you have. (Above is a DBX 31 Band Graphic Equalizer)


PARAMETRIC EQ
The word parametric means something that has one or more parameters on which the outcome depends. The parameters used in parametric audio equalization are centre frequency, bandwidth, and amplitude. Like a Graphic EQ, a Parametric EQ gives you more accuracy and flexibility, especially in audio recording. In most DAWs (Digital Audio Workstations) today Parametric EQ is a must have tool for mixing audio. Shown above is a Parametric EQ plug-in for Pro Tools HD. 

For more info on EQ check out: A Guide to Equalization

Saturday, November 13, 2010

Balanced or Unbalanced? (Part 2)

For an introduction on unbalanced cable check out Part 1 of this blog, otherwise for balanced cable continue on with Part 2.

Balanced Analog Cable

Balanced cables use three lines to transmit the electronic audio signal of a microphone or instrument: a positive (hot or live) line, a negative (cold) line, and a dead (grounded) line. The grounded line, like in an unbalanced cable, protects your equipment by bonding any extra volts that come across the line. However, unlike the unbalanced cable, the balanced cable has two lines carrying the audio signal- the positive and negative lines.

The most common balanced audio cable connection is the XLR.
XLR (Male and Female ends)
To protect the audio signal from any noise interference, the signal going down both lines is inverted to opposite polarities. The original signal goes down the hot line while the flipped signal goes down the cold line. This is why balanced cable is used for longer runs.


At the input stage of the mixer, the trick of noise reduction occurs. For when the original and inverted signal meet at the mixer the signal is re-inverted to make both desirable audio signals the same, and any unwanted noise is canceled out. Not only does this clean up the signal, but it boost it for a more professional tracking.   

For more information on balanced audio signal check out this video: Advantages of Balanced Audio Signals  

Balanced or Unbalanced? (Part 1)

When using audio cables, there are two main types of cable that you will run into: Balanced and Unbalanced cable. In Part 1 of this blog I will talk about unbalanced cable and then Part 2 will cover balanced cable.

Unbalanced Analog Cable

Unbalanced cables use two lines to transmit the electronic audio signal, a positive (hot or live) line, and a earth (grounded) line. The positive line carries the signal while the grounded line bonds any extra volts that come across the line to protect your equipment. However, having a grounded line does not protect the audio signal from noise. This is why unbalance cable is good for short runs, usually no longer than 3 feet, and less professional applications.

The most common unbalanced audio cables are ¼ mono inch jack connectors and RCA connectors.
1/4 inch (mono)
RCA (mono)
As you can see below, ¼ inch connectors can come either balanced or unbalanced. When choosing a ¼ cable be sure to look and see if it has two insulating rings or one insulating ring. If it has two insulating rings then it is a balanced TRS (Tip Ring Sleeve) cable, but if it has one insulating ring it is an unbalanced TS (Tip Sleeve) cable.
1. Sleeve: usually ground
2. Ring: Right-hand channel for stereo signals, negative phase for balanced mono signals, power supply for power-requiring mono signal sources
3. Tip: Left-hand channel for stereo signals, positive phase for balanced mono signals, signal line for unbalanced mono signals
4. Insulating rings

*Check out part 2 of this blog for info covering balanced cables.

The Main Mics (Part 1)

Microphones come in a range of different design types depending on the size and style but, like in my blog Microphone ‘Magic’, they basically all do the same thing: they convert sound vibrations into an electric audio current. The most common microphone is probably the Shure SM58 Dynamic Mic (pictured below).


  The Dynamic Mic is a multipurpose mic for picking up different sound waves from vocals and guitars. Due to the robust inner makeup of a dynamic microphone it has become a very durable mic for all live sound engineering. However, since they require significant energy (sound vibrations) to move the coil of wire, high and low frequencies are not well defined and you lose definition of the sound waves. This is where two other types of microphones become useful: a ribbon and a condenser.


*Check out Part 2 for info on a ribbon and condenser microphones.

The Main Mics (Part 2)

  Unlike Dynamic microphones, Ribbon Microphones are very sensitive in their makeup. Inside a ribbon mic is a thin strip of metallic foil suspended in front of, or between, two magnetic plates. Sound waves hit the foil causing vibration and movement in the magnetic field, which then produces the electrical current, creating the audio signal. Because of the delicacy of these microphones they are not used in live engineering but are useful in recording studios when you need more clarity in the sound of an instrument. However, cost can be a factor with ribbon microphones. They aren’t cheap and if you drop one it is useless, which is why Condeser Microphones are a good way to go.


  Rather than a vibrating wire coil or a thin piece of foil, a Condenser is made up of a thin diaphragm with a solid back plate called a capacitor. Voltage is created between the capacitor and diaphragm by an internal battery (or phantom power coming from the sound board). As sound vibrations hit the diaphragm, the capacitor is moved closer or farther away, changing the capacitance and relaying the (voltage) audio signal to the mixer.

  In summary, condenser microphones and ribbon mics are more sensitive, with better frequency and clarity of sound, as well as higher cost compared to a dynamic mic. Dynamic microphones are cheaper, not as delicate, and can generally sustain louder sounds before they distort. Weather you are needing a mic for live sound engineering or home recording one of these three will do the trick, you just have to decide by trying them out for yourself. If you have a local studio or music store that is willing to let you borrow these mics or use them in the store before you buy I highly recommend it. Pick up some mics and let me know what you think.

Choosing a Polar Pattern (Part 2)


  The bidirectional (you have another hint with ‘bi’-two) pattern is when a microphones diaphragm is equally sensitive in the front and the rear, while rejecting sounds from the sides. As you can see in the diagram the pattern looks like a figure 8, which is why it is sometimes referred to as a figure 8 pickup pattern.

  Bidirectional microphones are great for capturing duets either with vocals or instruments, as well as face-to face interviews. Just be sure and position the pattern of the figure 8 so that the musicians in the duet, or interviewees, are in the prime pattern area for vibration detection.

  As you can guess from the other patterns names, this pattern is also spelled out in its name. ‘Omni’-meaning all or unlimited, is a pickup pattern that collects vibrations equally from all directions. Unlike a cardioid mic (unidirectional), where you want to isolate specific sounds while blocking out ambient noise, the omnidirecitonal pattern captures the room resonance covering 360 degrees of sound vibrations.

  Boundary microphones are great for vocal groups, ambient noises, sound effects, and realistic live recordings. However, since you are picking up the boundary of an area feedback is easy to get. So, be sure and test any omnidirectional mic placement before you use it.

If you’re interested in more detailed information involving different pickup patterns check this video out: Polar Patterns - Microphone Specifications

Thanks for looking at my blog. Let me know if you were bored out of your mind or now more informed for reading. Comment below.